Brother MFC-L8900CDW Manual: A Comprehensive Guide
This manual provides detailed instructions for the Brother MFC-L8900CDW, a color laser all-in-one printer; It covers setup, operation, maintenance, and troubleshooting, ensuring optimal performance․
Welcome to the world of efficient and versatile printing with the Brother MFC-L8900CDW! This comprehensive all-in-one color laser printer is meticulously designed for demanding business environments․ It seamlessly integrates printing, scanning, copying, and fax capabilities (where applicable) into a single, powerful device․
The MFC-L8900CDW distinguishes itself through its flexibility, offering a wide selection of paper input options to accommodate diverse project needs․ Expect impressive print speeds of up to 31 pages per minute (ppm) and rapid two-sided scanning at speeds reaching 56 images per minute (ipm) in both monochrome and vibrant color․
This manual serves as your essential guide, providing step-by-step instructions to unlock the full potential of your MFC-L8900CDW․ Whether you’re a seasoned IT professional or a first-time user, this resource will empower you to confidently navigate every aspect of the printer’s functionality, from initial setup to advanced features and routine maintenance․ Refer to the service manual (SM_DCP-L8410CDW_MFC-L8610_MFC-L8690_MFC-L8900CDW_MFC-L9750CDW․pdf) for detailed component information․
Key Features and Specifications
The Brother MFC-L8900CDW boasts a robust feature set designed for productivity․ Key highlights include high-speed color printing at up to 31 ppm, automatic duplex (2-sided) printing, and a high-resolution color scanner with speeds up to 56 ipm․ It supports a variety of paper sizes and types, enhancing versatility․
Connectivity options are extensive, encompassing Gigabit Ethernet for wired networking and secure 802․11 a/b/g/n wireless LAN for flexible placement․ Mobile printing is supported via AirPrint, Google Cloud Print, and the Brother iPrint&Scan app, facilitating convenient printing from smartphones and tablets․
Specifications include: Print Technology – Laser; Color Capability – Yes; Maximum Print Resolution – 600 x 600 dpi; Standard Paper Capacity – 300 sheets (expandable with optional trays like LT-330CL/340CL); Monthly Duty Cycle – Up to 150,000 pages․ The MFC-L8900CDW also features a user-friendly touchscreen display for intuitive operation and control․ Detailed parts references are available in the service manual, including information on the Tower Tray (TT-4000) and Connector (TC-4000)․
Unboxing and Initial Setup
Carefully unpack your Brother MFC-L8900CDW, ensuring all components are present․ These typically include the printer itself, power cord, toner cartridges (starter set), drum unit, and accompanying documentation – including this manual! Remove all protective tape and packaging materials, both inside and outside the printer․
Initial setup begins with connecting the power cord and turning on the device․ The printer will guide you through the initial configuration process via the touchscreen display․ This includes selecting your language, country, and date/time settings․ It’s crucial to read the on-screen prompts carefully․
Next, load paper into the paper tray․ Ensure the paper guides are adjusted correctly for your paper size․ Before installing drivers, verify the printer is powered on and connected to a network (or prepare for a direct USB connection)․ Refer to the included quick setup guide for visual aids․ Keep the packaging for potential future transport or warranty claims․

Getting Started
Begin by installing the necessary drivers and software for your Brother MFC-L8900CDW․ Connect to your network, then perform initial print and scan tests to verify functionality․
Installing Drivers and Software
Proper driver and software installation is crucial for optimal Brother MFC-L8900CDW functionality․ Begin by downloading the latest full driver and software package directly from the official Brother support website․ Avoid using third-party driver download sites to ensure security and compatibility․
Once downloaded, run the installer and follow the on-screen prompts․ The installation process typically includes device drivers for printing, scanning, and faxing (if applicable), as well as utility software for managing the printer’s settings and monitoring its status․
During installation, you may be prompted to choose between a standard or custom installation․ A custom installation allows you to select specific components to install, which can be useful if you only need certain features․ After installation, restart your computer to ensure all drivers are loaded correctly․ Verify the installation by checking Device Manager to confirm the MFC-L8900CDW is recognized without any errors․
The Brother software suite provides tools for scanning to various formats, managing print queues, and configuring network settings․ Familiarize yourself with these tools to maximize the printer’s capabilities․
Connecting to a Network (Wired & Wireless)
The Brother MFC-L8900CDW offers both wired and wireless network connectivity, providing flexible integration into your existing infrastructure․ For a wired connection, simply connect an Ethernet cable from the printer’s Ethernet port to an available port on your router or network switch․ The printer will typically obtain an IP address automatically via DHCP․
To connect wirelessly, access the printer’s control panel and navigate to the network settings․ Select the wireless setup wizard and choose your Wi-Fi network from the list of available networks․ Enter your network password when prompted․ Ensure your printer is within range of your wireless router for a stable connection․
Once connected, you can confirm the printer’s IP address through the control panel or by printing a network configuration page․ This IP address is essential for accessing the printer’s web interface for advanced settings․ The Brother iPrint&Scan app facilitates easy mobile printing and scanning over your network․

Proper network configuration ensures seamless printing and scanning from multiple devices․
First Print & Scan Tests
After successful driver installation and network connection, performing initial print and scan tests is crucial to verify functionality․ Begin with a simple print test page directly from the printer’s control panel․ This confirms basic printing capabilities and toner cartridge operation․ Next, print a document from your computer to ensure proper communication between the printer and your system․
For scanning, utilize the Brother scanner software installed during the driver setup․ Initiate a scan using the default settings, saving the scanned document as a PDF or other desired format․ Verify the scan quality and ensure the file is accessible on your computer․
Test scanning to email functionality by configuring the settings within the printer’s web interface․ Send a test scan to your email address to confirm proper email server integration․ These initial tests validate the core functionalities of the MFC-L8900CDW, ensuring a smooth user experience․
Addressing any issues during these tests early on streamlines future operations․

Core Functionality
The Brother MFC-L8900CDW excels in printing, scanning, and copying, offering speeds up to 31ppm and 56ipm for scans․ It’s designed for efficient document handling․
Printing Documents
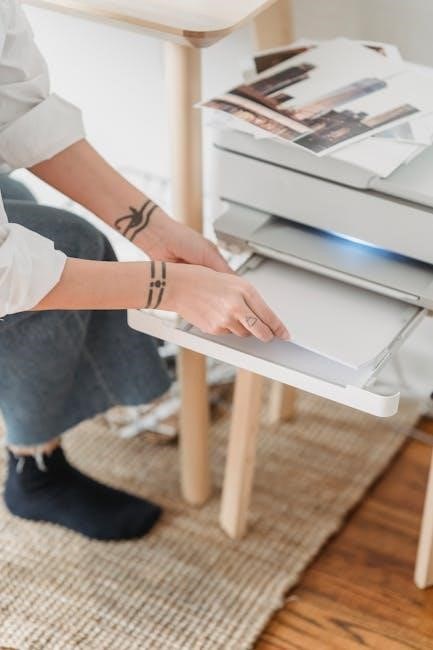
The Brother MFC-L8900CDW delivers high-quality printing for various business needs․ This section details how to effectively utilize the printer’s capabilities for optimal document output․ Begin by ensuring the correct paper type is loaded, as supported options include plain paper, glossy, and recycled stock․ Accessing print settings allows customization of resolution, color mode (color, grayscale, or monochrome), and paper size․
Print speed reaches up to 31 pages per minute (ppm), enhancing productivity for large print jobs․ The printer supports automatic duplex printing, reducing paper consumption and costs․ To initiate a print job, select ‘Print’ from your application and choose the MFC-L8900CDW as the designated printer․ Explore advanced settings for features like booklet printing and watermark addition․ Regularly check ink levels to maintain consistent print quality․ The manual provides detailed guidance on troubleshooting common printing issues, such as faded prints or paper jams, ensuring smooth operation and reliable document production․
Print Quality Settings
Optimizing print quality on the Brother MFC-L8900CDW involves adjusting several key settings․ Access these options through the printer’s control panel or the printer driver on your computer․ Resolution is a primary factor, with choices ranging from standard to high, impacting sharpness and detail․ Color settings allow selection of vibrant color, grayscale, or monochrome for specific document types․
The ‘Image Enhancement’ feature can refine images and graphics for clearer reproduction․ Paper type selection is crucial; choosing the correct setting ensures optimal ink absorption and prevents smudging․ Experiment with ‘Halftone’ patterns for smoother gradients in images․ For professional documents, consider utilizing the ‘Print Quality’ presets, offering pre-configured settings for various applications․ Regularly cleaning the print heads, as detailed in the maintenance section, contributes to consistently high-quality output․ The manual provides detailed explanations of each setting, enabling users to tailor print quality to their precise needs and achieve professional-looking results․
Scanning Documents
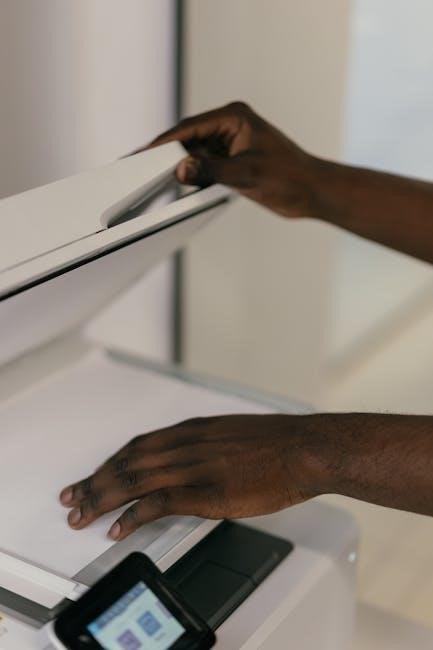
The Brother MFC-L8900CDW offers versatile scanning capabilities․ Initiate a scan from the printer’s control panel or directly from your computer using the Brother software․ Select your desired scan settings, including color mode (color, grayscale, or black & white), resolution (DPI), and file format (PDF, JPEG, TIFF, etc․)․ The scanner features both flatbed and automatic document feeder (ADF) options for handling various document sizes and types․
Utilize the ‘Scan to’ functions to send scanned documents directly to email, a network folder, or a USB drive․ Adjust image enhancement settings like brightness and contrast for optimal clarity․ The ADF supports duplex scanning, automatically scanning both sides of a document․ Explore advanced features like OCR (Optical Character Recognition) to convert scanned images into editable text․ Refer to the manual for detailed instructions on customizing scan profiles for frequently used settings, streamlining your workflow and ensuring efficient document digitization․
Scan to Email Configuration
Configuring Scan to Email on your Brother MFC-L8900CDW allows direct document sending without computer intervention․ Access the printer’s web interface or control panel menu to begin setup․ You’ll need your email server settings – SMTP server address, port number, and security protocol (SSL/TLS)․ Ensure your email provider supports these settings․
Enter your complete email address as the sender and recipient․ Authentication is crucial; choose between no authentication, standard authentication (username/password), or secure authentication․ Input your email username and password accurately․ Test the configuration by sending a test email to verify successful connection and delivery․
Customize settings like subject line and file name format․ Address book functionality allows storing frequent recipients for quick selection․ Regularly review and update your settings to maintain functionality, especially if your email provider changes its server requirements․ Detailed instructions and troubleshooting tips are available within the printer’s manual․
Copying Documents
The Brother MFC-L8900CDW excels in document copying, offering versatile features for efficient reproduction․ Begin by placing your original document on the Automatic Document Feeder (ADF) or the flatbed scanner․ Utilize the control panel to select your desired copy settings, including the number of copies, paper size, and copy quality․
Adjust copy density and contrast to achieve optimal results for various document types․ The machine supports both single-sided and duplex (two-sided) copying, saving paper and streamlining workflows․ Explore reduction/enlargement options to fit content onto different page sizes․ Utilize the ID-Card Copy function for reproducing both sides of identification cards onto a single page․
Preset copy settings allow for quick access to frequently used configurations․ The MFC-L8900CDW’s fast copy speeds ensure efficient production, even for large volumes․ Refer to the detailed manual for advanced features like multi-position copying and interruption settings, maximizing control over your copying tasks․

Advanced Features
The MFC-L8900CDW boasts advanced capabilities, including mobile printing, fax functionality, and duplex printing․ These features enhance productivity and offer versatile document handling options․
Fax Functionality (if applicable)
The Brother MFC-L8900CDW incorporates robust fax capabilities, allowing for efficient document transmission and reception directly from the device․ This feature is particularly valuable for businesses requiring traditional fax communication methods․ The printer supports both black and white, as well as color faxing, enhancing versatility․ Configuration involves setting up a phone line connection and defining fax settings through the printer’s control panel or web interface․
Users can utilize features like speed dial for frequently contacted numbers and fax forwarding to email for convenient access to received faxes․ The MFC-L8900CDW also supports PC fax, enabling sending and receiving faxes directly from a computer․ Detailed instructions for configuring and utilizing these fax functionalities are provided within the comprehensive user manual․ Troubleshooting tips for common fax issues, such as transmission errors or poor print quality, are also included to ensure seamless operation․ Remember to consult the manual for specific settings and optimal performance․
Mobile Printing Options
The Brother MFC-L8900CDW offers a variety of mobile printing solutions, enhancing convenience and flexibility for users who prefer to print directly from their smartphones or tablets․ These options include support for Brother’s iPrint&Scan application, available for both iOS and Android devices, enabling wireless printing and scanning․ Apple AirPrint is also supported, allowing seamless printing from iPhones and iPads without the need for additional drivers or software․
Furthermore, the MFC-L8900CDW is compatible with Google Cloud Print, providing access to printing from any Google Cloud Print-enabled device․ Setting up mobile printing typically involves connecting the printer to the same Wi-Fi network as your mobile device․ Detailed step-by-step instructions for configuring each mobile printing option are available in the printer’s user manual․ These features empower users to print documents, photos, and other content on the go, increasing productivity and streamlining workflows․ Explore the manual for optimal setup and troubleshooting guidance․
Duplex Printing (2-Sided Printing)
The Brother MFC-L8900CDW boasts automatic duplex printing capabilities, significantly reducing paper consumption and promoting environmentally friendly practices․ This feature allows you to print on both sides of a sheet of paper automatically, creating professional-looking documents with a reduced footprint; To enable duplex printing, access the printer settings through the control panel or the printer software on your computer․
Within the settings, locate the “Duplex” or “2-Sided Printing” option and select your desired binding edge – either long-edge binding (like a book) or short-edge binding (like a calendar)․ The printer will then automatically flip the paper and print on the reverse side․ Ensure the paper type is suitable for duplex printing to avoid jams․ The manual provides detailed illustrations and instructions for configuring duplex printing for various paper sizes and types․ Utilizing this feature not only saves paper but also reduces document collation time and costs, enhancing overall efficiency․
Maintenance & Troubleshooting
Regular maintenance ensures peak performance of your MFC-L8900CDW․ This section details solutions for common issues like paper jams, cleaning procedures, and deciphering error codes for swift resolution․
Paper Jam Solutions
Addressing paper jams promptly is crucial for maintaining your Brother MFC-L8900CDW’s functionality․ First, power off the printer and carefully open the access doors – the rear cover, lower tray, and potentially the internal sections․ Gently remove any visible jammed paper, avoiding torn pieces that could remain inside․
Inspect the paper path thoroughly, checking for obstructions․ Utilize the service manual references for component locations․ If paper is difficult to remove, slightly pull it in the opposite direction, applying even pressure․ Avoid using tools that could damage the printer’s delicate parts․
Once the jam is cleared, ensure all covers are securely closed before powering the printer back on․ If jams persist, examine the paper type – ensure it’s compatible and not overly damp or damaged․ Consider the lower tray (LT-330CL/340CL) and tower tray (TT-4000) for potential issues․ Refer to the error code descriptions for specific guidance related to jam locations․
Cleaning the Printer
Regular cleaning is essential for optimal performance of your Brother MFC-L8900CDW․ Begin by powering off the printer and disconnecting the power cord․ Use a soft, lint-free cloth to gently wipe down the exterior surfaces, removing dust and smudges․ Avoid using abrasive cleaners or solvents․
For internal cleaning, carefully access the paper path areas․ Use a dry cloth or a vacuum cleaner with a brush attachment to remove any accumulated paper dust․ Pay attention to the areas around the rollers and sensors․ Do not apply liquids directly to internal components․
The corona wire requires periodic cleaning; consult the service manual for specific instructions and safety precautions․ Regularly inspect and clean the scanner glass with a dedicated glass cleaner․ Proper maintenance, referencing the service manual’s parts reference list, extends the printer’s lifespan and ensures consistent print quality․
Error Code Descriptions
The Brother MFC-L8900CDW utilizes error codes to diagnose issues․ Understanding these codes, detailed within the service manual, is crucial for effective troubleshooting․ A “Paper Jam” error (typically a numerical code) indicates obstruction within the paper path – check all trays and access points․
“Toner Low” or “Toner Empty” messages require toner cartridge replacement․ “Service Call” errors often signify hardware malfunctions needing professional attention․ Codes related to the fuser unit suggest potential overheating or component failure, requiring a qualified technician․
Refer to the comprehensive error code list in the service manual (SM_DCP-L8410CDW_MFC-L8610_MFC-L8690_MFC-L8900CDW_MFC-L9750CDW․pdf) for specific actions․ Ignoring error codes can lead to further damage․ Always note the exact code displayed for accurate diagnosis and resolution, potentially involving parts from the parts reference list․

Parts Reference & Service Manual Information
Accessing the service manual (SM_DCP-L8410CDW…) is vital for repairs․ It details key components like the lower tray (LT-330CL) and tower tray (TT-4000) for maintenance․
Identifying Key Components (Based on Service Manual)
The Brother MFC-L8900CDW service manual meticulously details numerous internal components crucial for effective maintenance and repair․ Understanding these parts is paramount for technicians and advanced users․ Key areas include the laser scanning unit, responsible for image creation, and the transfer roller assembly, which facilitates toner adhesion to the paper․
The fuser unit, vital for permanently bonding toner, requires careful handling․ The developer unit, containing the toner, and the drum unit, which carries the electrostatic charge, are also essential․ Furthermore, the manual highlights the importance of the feed rollers, ensuring smooth paper handling, and the separation pad, preventing multiple sheet feeds․
Specific trays, like the Lower Tray (LT-330CL/340CL) and Tower Tray (TT-4000) with its connector (TC-4000), are individually identified․ The manual also provides diagrams illustrating the location of each component within the printer’s chassis, aiding in disassembly and reassembly․ Correct identification prevents damage during service procedures, ensuring optimal printer functionality and longevity․
Lower Tray (LT-330CL/340CL) Information

The Brother MFC-L8900CDW’s Lower Tray, designated LT-330CL or LT-340CL, significantly expands paper capacity․ This optional accessory is crucial for high-volume printing environments, accommodating various paper sizes and types․ Installation is straightforward, involving secure placement and connection to the printer’s base․ The service manual details proper alignment procedures to prevent paper feed issues․
Capacity varies slightly between the LT-330CL and LT-340CL models, but both support standard A4, Letter, and other commonly used sizes․ Proper paper loading is essential; the manual emphasizes avoiding overfilling and ensuring paper stacks are neatly aligned․ Troubleshooting common issues, such as paper jams within the tray or misfeeds, is covered extensively․
Regular inspection of the feed rollers within the lower tray is recommended to maintain optimal performance․ Cleaning instructions are provided to remove dust and debris that can impede paper handling․ The manual also outlines procedures for removing and replacing the tray for maintenance or when switching paper types, ensuring seamless operation․
Tower Tray (TT-4000) & Connector (TC-4000) Details
The Brother MFC-L8900CDW benefits from the optional Tower Tray (TT-4000), paired with the Connector (TC-4000), to further increase paper handling capabilities․ This addition is vital for businesses requiring substantial print volumes and diverse media support․ The service manual provides detailed diagrams illustrating the correct assembly and connection sequence between the TT-4000, TC-4000, and the main printer unit․
The TT-4000 significantly boosts paper capacity, accommodating larger stacks of various paper sizes, including specialty stocks․ Proper installation, as outlined in the manual, ensures stable operation and prevents potential paper feed errors․ The TC-4000 acts as the crucial interface, facilitating communication between the tower tray and the printer’s processing unit․
Troubleshooting guidance within the manual addresses common issues like paper jams within the tower tray or communication errors between the TC-4000 and the printer․ Regular maintenance, including cleaning the feed rollers and inspecting the connector for damage, is recommended to maintain optimal performance and longevity of these components․